Tuesday, February 11, 2014

Ready to dye?

Sometimes when you are getting ready to do a craft, you can't find the right material to use. You can find the fabric, but not the color you would like it to be.  So don't forget there are many things you can do to fabric to change the color.  In the background of this bunny is white plush felt.  White felt/fur is pretty easy to find, getting it in colors? that's another thing.  Didn't really want the bunny white, so I coffee stained the felt and got the color I liked.  I did the same thing with the cotton that was used for the body as well.  After I finished this one bunny, my husband suggested bunnies in other colors for Easter.  Wait....what?  It was a good idea, and then came the use of Rit dye.
 If you didn't know there are different kinds of dye and the have different purposes.  There are dyes that are intended to be used with plant based fibers and ones that you would use with animal based fibers.  For example, you wouldn't want to use Rit dye (dye intended for plant based fibers) on wool (animal based fiber)  Hope this isn't confusing, just thought you would want to know.  Actually, I should say, I couldn't guarantee what kind of results you would get.  I had done some work with Rit in the past so it wasn't my first time using the product.  I would recommend the liquid dye, it is more expensive, I think a $1 more for liquid then powder, but it doesn't like undissolved dye spots on your fabric.  I wanted the plush felt pastel looking in color, so I went easy on the dye in the water.  I added hot water to my kitchen sink, its the easiest to bleach clean, you will want to think about how much water you will need to cover your material.  I used about 12", so I didn't need much water, probably a gallon at the most, and about 1-2 T. dye.  I soaked the fabric in the dye solution for about 30 minutes.  Because I knew these rabbits weren't going to be washed I didn't cold water rinse the fabric.  I rung it out by hand and allowed it to air dry.
Here are the colors I ended up with.  Sorry there aren't bigger pieces for you to see the colors better.  In my excitement to see the finished bunnies, I quickly cut them out.  But the results were a soft pink, blue, yellow and , of course, lavender.  Hope this makes you want to try your hand at using dye.

Thursday, February 6, 2014

Where do ideas come from?

 This was a Christmas card that my daughter got this past year, she loves birdies. I thought this would look good on a towel.
 So I picked out some fabrics and drew out some birds.
 Here's kind of what I kind of came up.  I picked out which bird and which wing I wanted on each piece of fabric.  You will need to iron Wonder Under or some other fusible web, onto the wrong side of the fabric.  Then take your pattern piece, and place it on the paper side of the Wonder Under, and trace this design.  Cut this out.

 Here you can see the bird and the fabric through the Wonder Under.
 You will need to take the paper off the back of the bird.  I like to use a pin to help with this.  Put the birds on the towel and iron them into place.  I machine stitched around the edge of the birds and the wings, you could do this by hand if you like.  You can add whatever else you would like. 

Tuesday, February 4, 2014

Take an idea and run with it

 Sometimes some one else does a turn on your post - amps it up a level and its just too cute not to share.  So, in a previous post we took a pop can and turned it into a scoop and a candle holder.  Painted it and added some spice.   How about a soup can that you paint and add a candle and a pick to the top?  How cute is that!
 Here is a salt dough bowl, that wasn't painted.  The 'fabric' pieces are salt dough that has been painted and then several sewing items are placed in the bowl. This one is my personal favorite, gift from a friend!
Remember the snowman bowling pin?  This is a bowling pin that was covered with wrapping paper that looks like sheet music.  What would we do with out Mod Podge?  Hope this inspires you to try something new today!

Snowman-no snow required!

 So how much do we love snowmen that we can make and not get cold making? 
 So the container these little guys are in is a black lunch bucket,  you could use anything you wanted, but these are pretty easy to pick up at a thrift store or garage sale.  It would be a great way to re-use an old tool box that had sentimental value to you.  You are also going to need some screwdrivers.  Probably not a good idea to use your husband's, just saying, so go ahead and pick some of these up and an antique store, or garage sale as well.  I used some that had wooden handles and some that had plastic,  you are going to paint them, so either will work.
 Next I hot glue a styrofoam block to the bottom of the lunch bucket. This will be what you poke your screwdrivers into to help hold them up.
 I used shredded up sheet music, but you could use whatever else you had or can come up with. That will cover up the block of foam.
 Now for the snowmen.  I used aluminum foil and made balls, covered the balls with oven bake clay. Baked them, like the clay will tell you to, and then hot glued them onto the end of the screwdriver.
After they were baked and cooled, I used acrylic paint and painted the whole thing with two coats of paint.  Add eyes and nose and wahla! you are done.  I used Sharpie markers for eyes and nose, black for eyes and mouth and orange for the nose.  Stick those little guys in the foam and add some lights if you like and you are finished with a cute little arrangement that can smile at you on even the coldest days.  Hope you enjoy!

Friday, January 31, 2014

Buttons, buttons, who's got the button....

 So now to finish up the buttons..... Remember I said, I wanted to make these as coasters!  It seemed like such a great idea!  Not really sure what I was thinking,  how is a glass going to sit flat on something that stick up that high?  So, now I'm thinking of using them in a wreath, or in a bowl.  To finish....
 Pick an acrylic paint that is the color of the button you would like.  I went with a lot of neutrals and a country blue and barn red.  My buttons took two coats of painting, and then I used two coats of sealer on them as well.  Remember, the coasters.  oh boy!
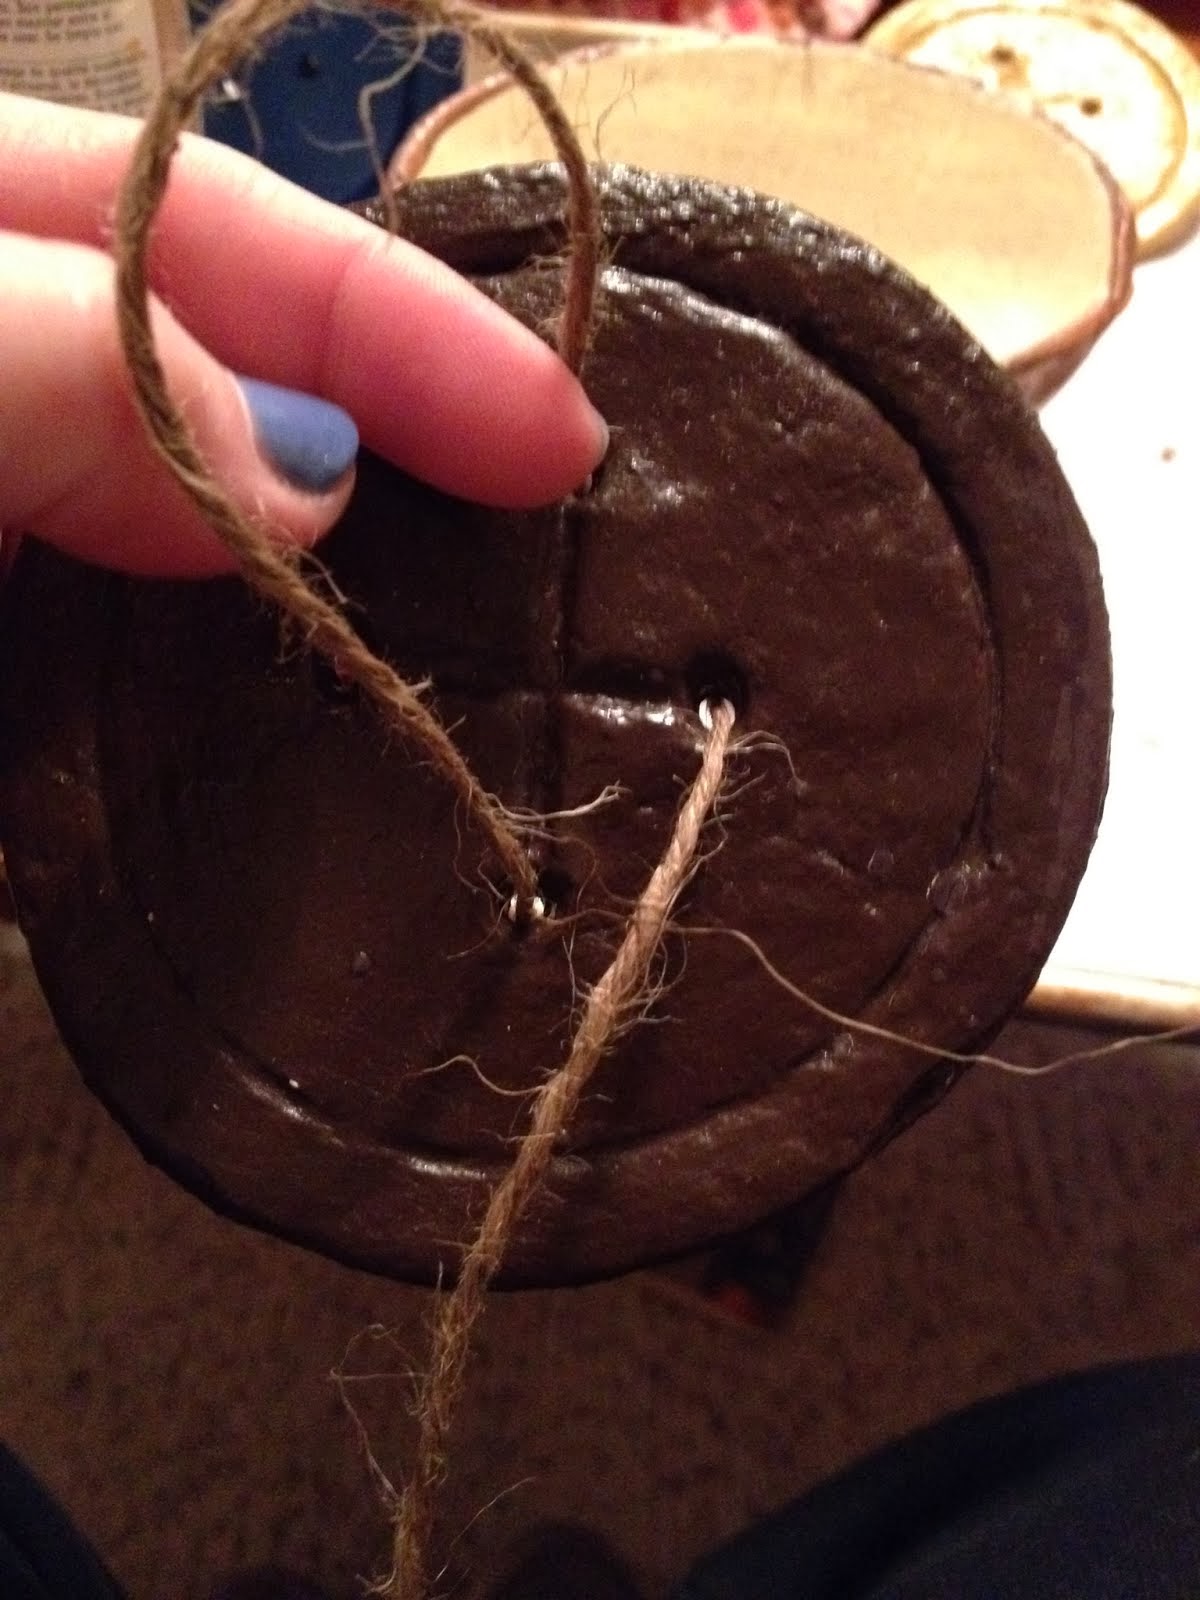
 I knew I was going to use jute as the thread. In giving you directions, I'm going to use the four squares in the buttons as north, east, south and west.  I thought this would be less confusing.  So take a good length of thread, and go down in the east and come up in the north.
 Then go down in the south and up in the west.
 Kind of tighten up your jute and tie a square knot.
These were so much fun to make.  Hope you have as much fun as I did! 

Thursday, January 30, 2014

Back to the salt mine....

So here is the finished bowl, using salt dough recipe from earlier post. In case you don't want to look back, its 2 cups flour, 1 cup salt, and 1 cup water.  I like to show you the finished piece first, so you know what we are going to be doing and I think its easier to follow along.  So mix your dough up and roll it out.
 Again, the dough is about 1/4" thick and was rolled out on a floured surface.  I didn't use a whole batch of flour to do this bowl, I'd say about half, but if you are doing a large bowl, you will want to make more.  Just play with it and see what works, this is meant to be FUN!!!
 I thought a bowl this size would be kind of a good size to begin trying.  Your bowl will need to be oven safe.  I made sure I used spray on the bowl, so the dough would slip off when I was done with the baking process.  I thought about aluminum foil, but wasn't sure if the folds would make the inside of the bowl kind of wrinkley (I don't think that's a word, but I think you know what I mean) 
 I put the dough over the bowl, and cut away what was extra.  Kind of like a pie crust, if you make pies that way :)  And you are ready to put this bad boy in the oven,  bake it around 200 degrees, so it won't burn and it may take several hours. 
 Once the salt dough is baked, you can finish it however you like.  I used off white paint, I know it looks kind of white, and did an under coat.  Then because I didn't want the paint solid, I rubbed a candle over the outside of the bowl.  Then I painted the outside with brown acrylic paint.
 I put a sealer over all of the bowl, inside and out.  The inside of the bowl, did this crackle looking thing!  It's kind of cool, but I'm not sure why it did that.  The good thing about this process is, if you don't like it, you aren't out a lot of money.  But if you do like it, it's kind of cool. I'm using mine  as a catch all for "stuff"  Hope you have fun and let me know how yours turn out. 

Wednesday, January 29, 2014

Salt dough? who knew it could be so much fun!

Remember doing salt dough ornaments as a kid?  We did a lot of Christmas ornaments cutting out shapes with cookie cutters and painting them.  Well, salt dough has made a come back with folks doing all kinds of things with them.  The next several posts will be about some of the things you can do/make with this inexpensive dough.  There are several recipes you can find, but the one I go to is 2 cups flour, 1 cup salt and 1 cup water.  
 So find a bowl you can mix those ingredients up in and let's get started.  I love working with this dough, but it does dry out your hands.  Just a warning.
 Sometimes you will need to add a little more water, remember this isn't rocket science!  and have fun!  I do knead mine some, I don't know that its necessary, I just love kneading dough, its like therapy to me!
 Roll the dough out evenly, on a floured surface.  The thicker your dough the longer it will take to dry, but it does tear easier.  I'd say this was maybe 1/4" thick.  I wanted to make the buttons you saw in the first picture.  My idea was to make them into coasters, for a button loving woman I know. 
 So to cut the circles as big as I wanted them, I used a plastic storage container.  It had a slight lip on it, which was just perfect for cutting through the dough. I cut 5 circles from the dough.
 For the button holes, I used a straw.  You can do several holes, before the end of the straw gets plugged up and you need to empty it to make more holes.
 I didn't measure mine, just eye-balled them.  If you want to measure, feel free to do so.
 I knew that I was going to use jute as my "thread" when I had them painted.  I thought if I gave the jute a grove before I did the baking, there would be a nice place for the jute to lay. (More about this later!)
 I also knew I wanted the buttons to have an indent a little ways from the edge, like some buttons do.  So to achieve this, I used a piece of stemware that was about 1/4"-1/2" away from the outer edge. When I had that centered on the button, I pushed it down to make an indent.
I put these on aluminum foil and baked them in the oven.  I used the convection feature in the oven, to hurry the process along.  You don't want to burn them but you want to make sure they are good and dry.  These took several hours.  Finishing will be another post!